Are you a Roblox player looking to stand out from the crowd with a unique avatar? Many gamers, particularly those balancing work and family, want creative outlets without a steep learning curve or significant time investment. This comprehensive guide will walk you through how to make a head in Roblox, from understanding the basics of existing custom heads to diving into Roblox Studio for advanced creation. Discover tips for optimizing your head designs, ensuring performance, and integrating them seamlessly into your game. We understand the challenge of limited gaming time, so we've structured this resource to provide clear, actionable steps that fit into your busy schedule. Learn to craft distinctive heads that express your personality or brand, making your Roblox experience more engaging and visually appealing. This article addresses common pain points like getting started, making your creations look professional, and ensuring compatibility. Whether you are aiming for a classic block head redesign or a complex mesh, we provide the knowledge you need to succeed, all while respecting your valuable time.
How can I get a custom head without making it myself?
Many busy gamers prefer to buy pre-made custom heads. You can find a vast array of unique and stylish heads in the Roblox Avatar Shop, created by both Roblox and talented community members through the User Generated Content (UGC) program. These often range from simple designs to complex animated dynamic heads. Simply browse the 'Heads' category, filter by style or price, and purchase with Robux. This is the quickest way to personalize your avatar if you're short on time.
What is the typical cost range for custom heads in the Avatar Shop?
The cost of custom heads in the Roblox Avatar Shop varies widely. Simple static mesh heads might start from around 50-100 Robux, while more intricate designs, especially animated or dynamic heads with unique features, can range from 300 to over 1000 Robux. Legendary or limited-edition heads can be significantly more expensive. It often depends on the creator's reputation, the complexity of the design, and current market demand. Always check reviews before buying.
Can I use my custom head outside of Roblox Studio games?
Yes, if you've uploaded your custom head as an avatar item through the Roblox UGC program and it gets approved and published, other players can purchase and use it on their personal avatars across any game on Roblox. If you're creating a head specifically for your own game, you can integrate it as an asset within that experience without needing UGC approval, making it unique to your project.
What are common mistakes to avoid when making a Roblox head?
When making a head in Roblox, common pitfalls include excessively high polygon counts which cause lag, poor UV unwrapping leading to distorted textures, incorrect scaling that makes the head too big or small for an avatar, and not setting up proper rigging for animated heads. Always test your creation thoroughly in Studio and on different devices to catch these issues early. Also, ensure your asset adheres to Roblox's community standards and terms of service to avoid moderation issues.
How do I add accessories to my custom head in Roblox Studio?
To add accessories like hats, glasses, or hair to your custom head, you'll typically use the 'Accessory' instance in Roblox Studio. Model your accessory separately, then insert it into your workspace. You'll need to add an 'Attachment' to both your custom head and the accessory, usually named 'HatAttachment' or 'FaceAttachment', ensuring their positions are aligned. Then, parent the accessory model to the avatar's head or 'HumanoidRootPart' and it should attach correctly.
What are the system requirements for using Roblox Studio to make heads?
Roblox Studio itself is relatively lightweight, but for complex 3D modeling, you'll benefit from a decent PC. A quad-core processor (Intel i5/Ryzen 5 or better), 8GB of RAM, and a dedicated graphics card (NVIDIA GTX 1060 or AMD RX 580 equivalent or better) are recommended for smooth performance, especially when handling high-polygon meshes or detailed textures. For serious 3D work in Blender, more RAM and a stronger GPU are highly advisable, ensuring a smooth workflow for busy creators balancing their gaming and development time.
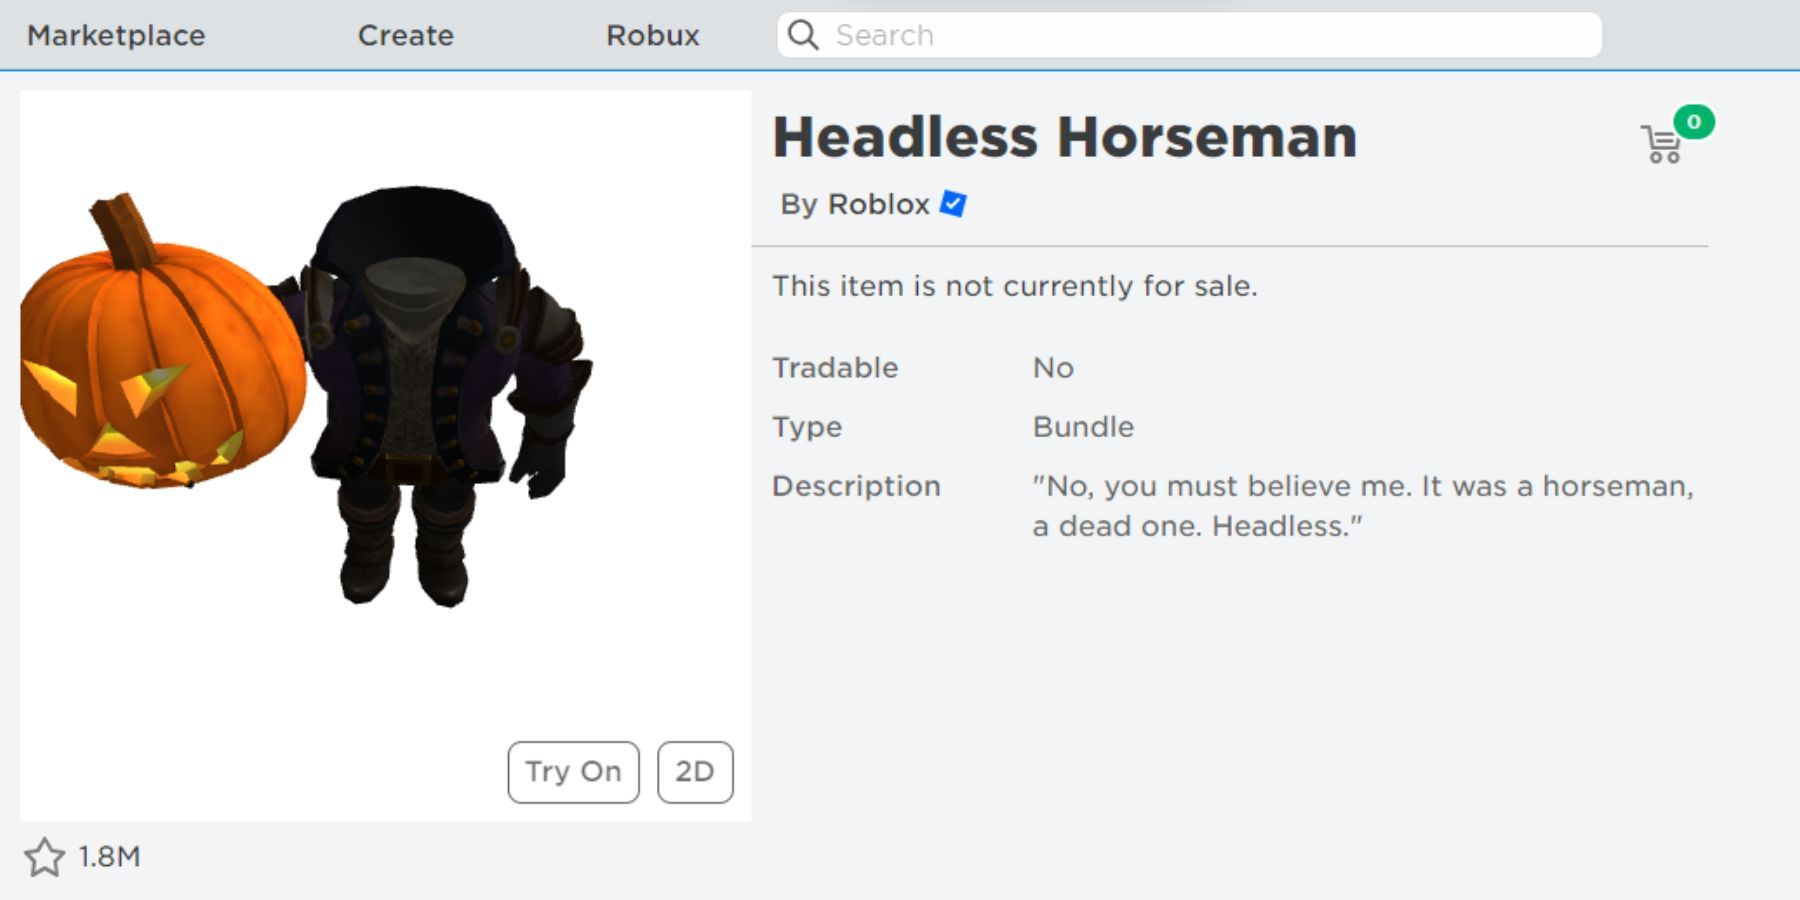
Is it possible to make a "headless" avatar with a custom head effect?
Yes, achieving a "headless" look combined with a custom head effect is a popular customization. The traditional "headless horseman" look involves purchasing the 'Headless Horseman' bundle which makes your head invisible. If you want a similar effect with a custom head, you can either use an invisible head mesh from the Avatar Shop and place your custom accessory (like a floating mask or a unique particle effect) where the head would be, or you can create a completely transparent custom head mesh and attach your desired visual effects to it. This requires careful positioning and sometimes scripting for a seamless appearance.
For many adult gamers, Roblox isn't just a platform; it's a creative sandbox, a social hub, and a place to unwind after a long day. If you're like the 87% of US gamers who regularly dive into virtual worlds, spending an average of 10+ hours a week, you know the value of personalization. We balance jobs, families, and life's demands, and when we game, we want it to be fun, relaxing, and perhaps a little bit about building something cool. One of the ultimate ways to express yourself or enhance your game project is by creating a truly unique head for your avatar. Gone are the days of basic blocky heads being your only option. Today, with advancements in Roblox Studio, you can sculpt, texture, and animate heads that truly stand out. But where do you start? The idea of making a custom head might seem daunting, especially if your gaming time is precious. This guide is designed for you, the busy gamer who wants to level up their Roblox creation skills without getting bogged down in hype or overly technical jargon. We'll demystify the process of how to make a head in Roblox, breaking it down into manageable, actionable steps. From choosing the right tools to understanding the technical bits, we’re here to help you craft a head that not only looks great but also performs well within the Roblox ecosystem. Let’s dive in and transform your avatar or game characters with a touch of personal flair!
US gaming trends this month show a continued surge in user-generated content and social gaming, with mobile platforms dominating. Personalization on platforms like Roblox directly taps into this desire for individual expression and community building. Creating unique assets, such as custom heads, can significantly boost your engagement and presence within the Roblox creator community.
What are the different types of heads available in Roblox?
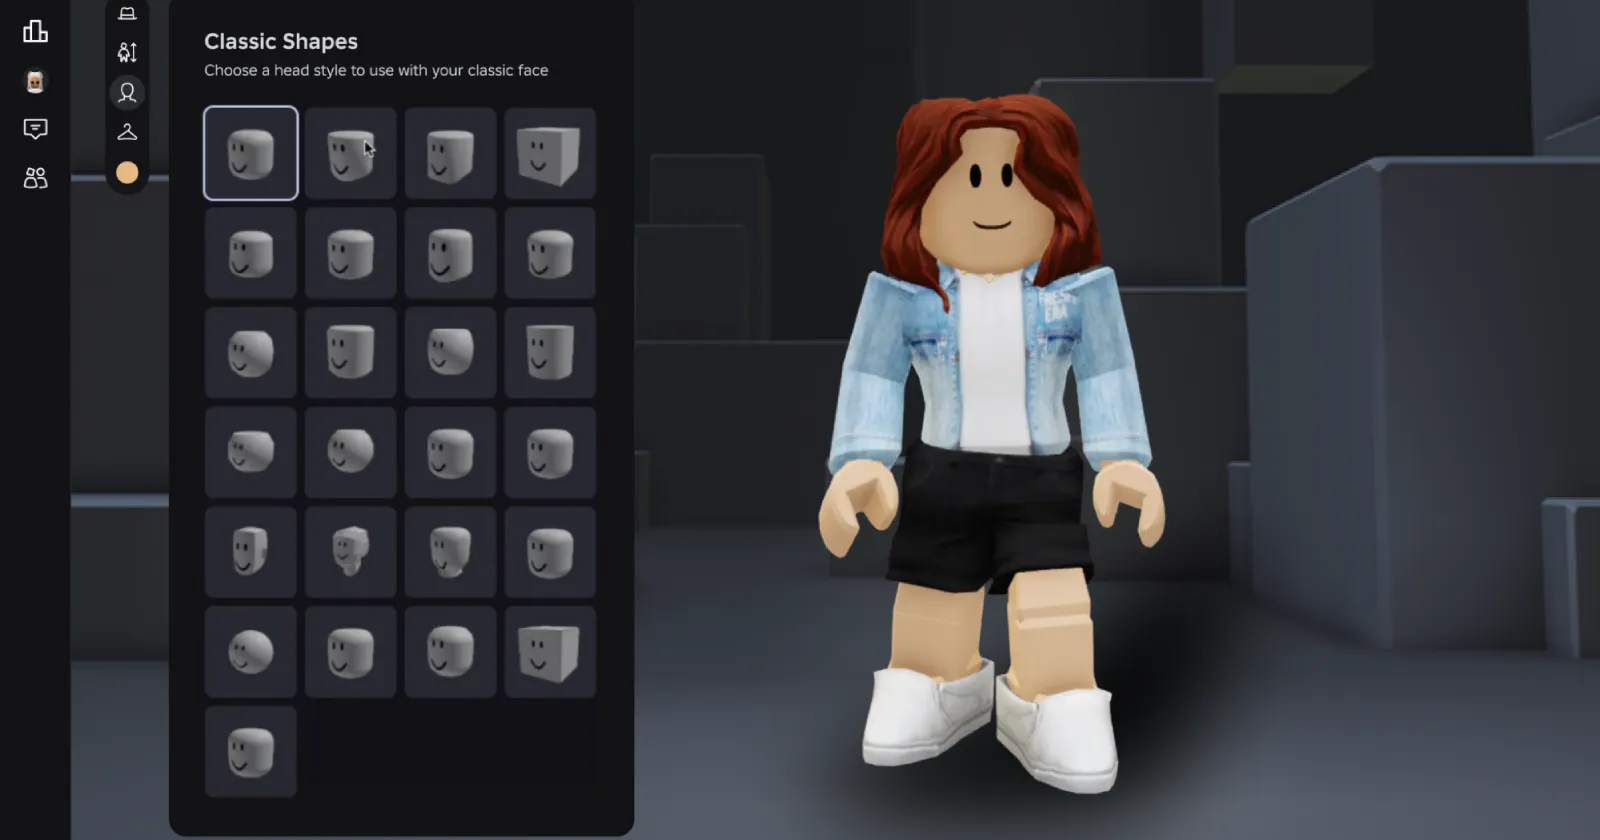
Before you jump into creation, it’s helpful to understand the landscape of Roblox heads. Traditionally, Roblox characters used classic block heads, which were simple, geometric shapes. Over time, the platform evolved to include R6 and R15 avatars, offering more articulation and detail. Today, we have access to mesh heads, which allow for much more complex and organic shapes, similar to what you might see in high-fidelity games. These mesh heads can be created by Roblox itself, purchased from the Avatar Shop, or, excitingly, created by users like you through Roblox Studio. Knowing these types helps you decide on the complexity and style you want to achieve when you set out to make a head in Roblox.
Understanding the distinctions between these head types is crucial for optimizing performance and visual fidelity. While highly detailed mesh heads offer greater aesthetic appeal, simpler block heads can be beneficial for lower-end devices or large-scale experiences to ensure smooth gameplay, reflecting a key concern for many US gamers balancing budget hardware with enjoyable experiences.
Exploring Roblox's New Dynamic Heads
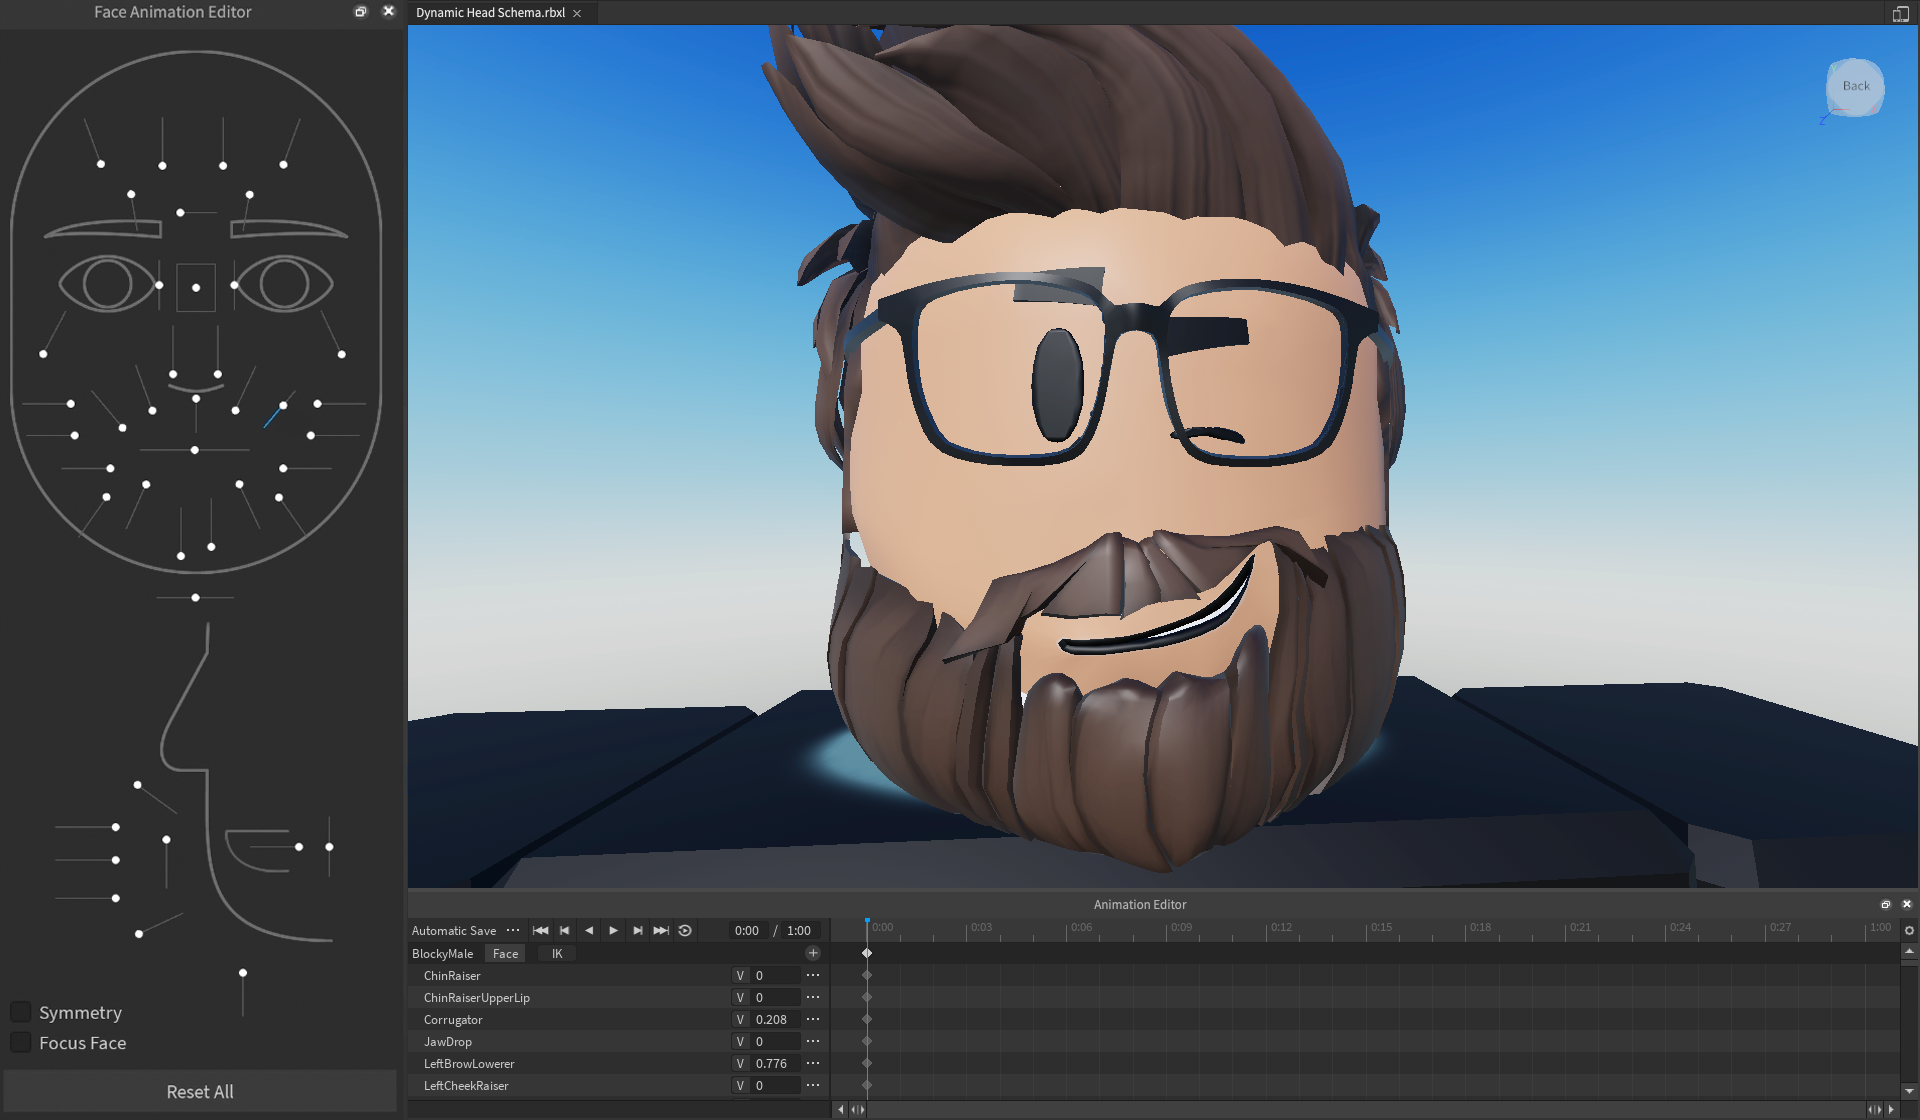
Roblox has introduced dynamic heads, which feature facial expressions and intricate animations, adding a new layer of realism and interaction to avatars. These heads leverage advanced rigging and blend shapes to allow characters to emote based on in-game actions or even real-time facial tracking. Creating a dynamic head is a more advanced process, requiring knowledge of 3D modeling, rigging, and animation principles, but the results can be incredibly impactful for immersive experiences and social interactions.
How do I create a simple custom head using Roblox Studio?
Creating a simple custom head in Roblox Studio is more accessible than you might think. For those of us with limited time, starting with basic shapes and manipulating them is a great entry point. Here’s a streamlined approach:
- First, open Roblox Studio and create a new baseplate.
- Insert a 'Part' into your workspace. This will be your starting point. You can make it a 'Sphere' or 'Block' depending on your desired base shape.
- Use the 'Scale' tool to resize the part into a head-like proportion. Don't be afraid to experiment with width, height, and depth.
- To refine the shape, you can use Boolean operations (Model Tab -> Union/Negate) to combine or subtract parts, creating features like eye sockets or a jawline.
- Once you have a basic form, consider adding a 'Decal' or 'Texture' to give it some visual character. You can find pre-made textures or upload your own.
- Finally, group your head parts into a 'Model' and name it appropriately, like 'MyCustomHead'.
Remember, the key here is starting simple and gradually adding detail. This method is perfect for quick creative bursts for busy gamers.
What tools do I need for advanced 3D modeling for Roblox heads?
For gamers ready to dive deeper into how to make a head in Roblox with more complex designs, external 3D modeling software is essential. Blender is a powerful and free open-source tool that's widely used in the Roblox development community. Other popular options include Maya and 3ds Max, though these typically come with a cost. These tools allow you to sculpt intricate details, create complex mesh geometries, and perform advanced UV mapping for detailed texturing.
- Blender: Free, powerful, and has a vast community for tutorials. Ideal for sculpting, retopology, UV unwrapping, and animation.
- Maya: Industry-standard, excellent for animation and complex modeling, but expensive.
- 3ds Max: Strong for architectural visualization and modeling, also a professional-grade paid software.
Learning these tools takes time, but the investment pays off with highly professional and unique assets for your games or avatar. Many adult gamers find learning a new skill like 3D modeling to be a rewarding way to engage with their hobbies.
How do I prepare my 3D model for import into Roblox Studio?
Once you've crafted your masterpiece in Blender or another 3D software, preparation for Roblox Studio is crucial for a smooth import process. This step is about ensuring your model is clean, efficient, and ready for the Roblox engine.
- Clean Geometry: Ensure your mesh has good topology. Avoid N-gons (faces with more than 4 vertices) and overlapping faces. Triangulate your mesh if your software doesn't do it automatically, as Roblox primarily uses triangles.
- UV Unwrapping: This is critical for applying textures. Properly unwrap your model's UVs so that your texture coordinates are laid out neatly without overlaps.
- Texture Creation: Create your textures (color, normal, roughness maps) in an image editing software like Photoshop or GIMP. Make sure they are power-of-two dimensions (e.g., 512x512, 1024x1024).
- Export as FBX: The FBX format is the most reliable for importing 3D models into Roblox Studio. When exporting, ensure you include embedded media (textures) if your software allows, or keep them separate to upload in Studio.
- Check Scale: Roblox has a specific scale. Exporting your model at a roughly human-like scale in your 3D software (e.g., 1 unit = 1 stud in Roblox, where a character is about 5 studs tall) will save you resizing headaches later.
These steps prevent common import issues and ensure your custom head looks exactly as you intended in Roblox.
What are the best practices for texturing a Roblox head?
Texturing is where your head truly comes to life. A good texture can turn a basic mesh into a character with personality. When texturing a Roblox head, focus on clarity, resolution, and efficient use of texture space.
- High-Resolution Textures (within limits): Use textures that are clear but not excessively large. For heads, 512x512 or 1024x1024 pixels are generally good resolutions that balance detail and performance. Remember, bigger isn't always better for game assets, especially considering mobile players.
- UV Map Efficiency: Utilize your UV space effectively. Scale up important areas (like the face) on your UV map to give them more pixel density, allowing for finer details.
- PBR Workflow: Roblox supports Physically Based Rendering (PBR), which allows for more realistic materials. Learn to create diffuse (albedo), normal, metallic, and roughness maps for a professional look.
- Consistency: Ensure your head's texture style matches the overall aesthetic of your game or avatar. A cartoon head with a hyper-realistic body might look odd.
- Testing: Always test your textures in Roblox Studio. Lighting can affect how textures appear, so check it under various conditions.
Thoughtful texturing ensures your head looks polished and professional, a detail appreciated by gamers who value high-quality content.
How can I ensure my custom Roblox head is performant?
Performance optimization is critical, especially when targeting the diverse range of devices US gamers use, from powerful PCs to everyday mobile phones. A stunning head that lags the game is not ideal. Here's how to ensure your custom head performs well:
- Polygon Count: Keep your polygon count as low as possible without sacrificing essential detail. A good target for a single head might be anywhere from 500 to 5000 triangles, depending on complexity and target platform. High polygon counts can severely impact frame rates.
- Texture Atlas: If your head has multiple textures, try to combine them into a single texture atlas. This reduces draw calls, which significantly improves performance.
- Level of Detail (LOD): For complex heads, consider creating simpler versions for when the player is far away. Roblox Studio has LOD features that can automatically swap models based on distance.
- Material Use: While PBR materials look great, overuse of highly complex materials can be taxing. Balance visual fidelity with efficiency.
- Scripting: If your head has any attached scripts (e.g., for animations or special effects), ensure they are optimized and only run when necessary.
By keeping performance in mind during creation, you ensure your custom head enhances, rather than hinders, the player's experience. This is a common pain point for gamers on older hardware or those trying to balance many apps.
Can I make a head animated in Roblox?
Yes, absolutely! Creating an animated head in Roblox takes your avatar customization to the next level. Animated heads, especially the newer dynamic heads, can convey emotions, blink, and even react to voice input, making your character feel much more alive. This involves a process called rigging and animating.
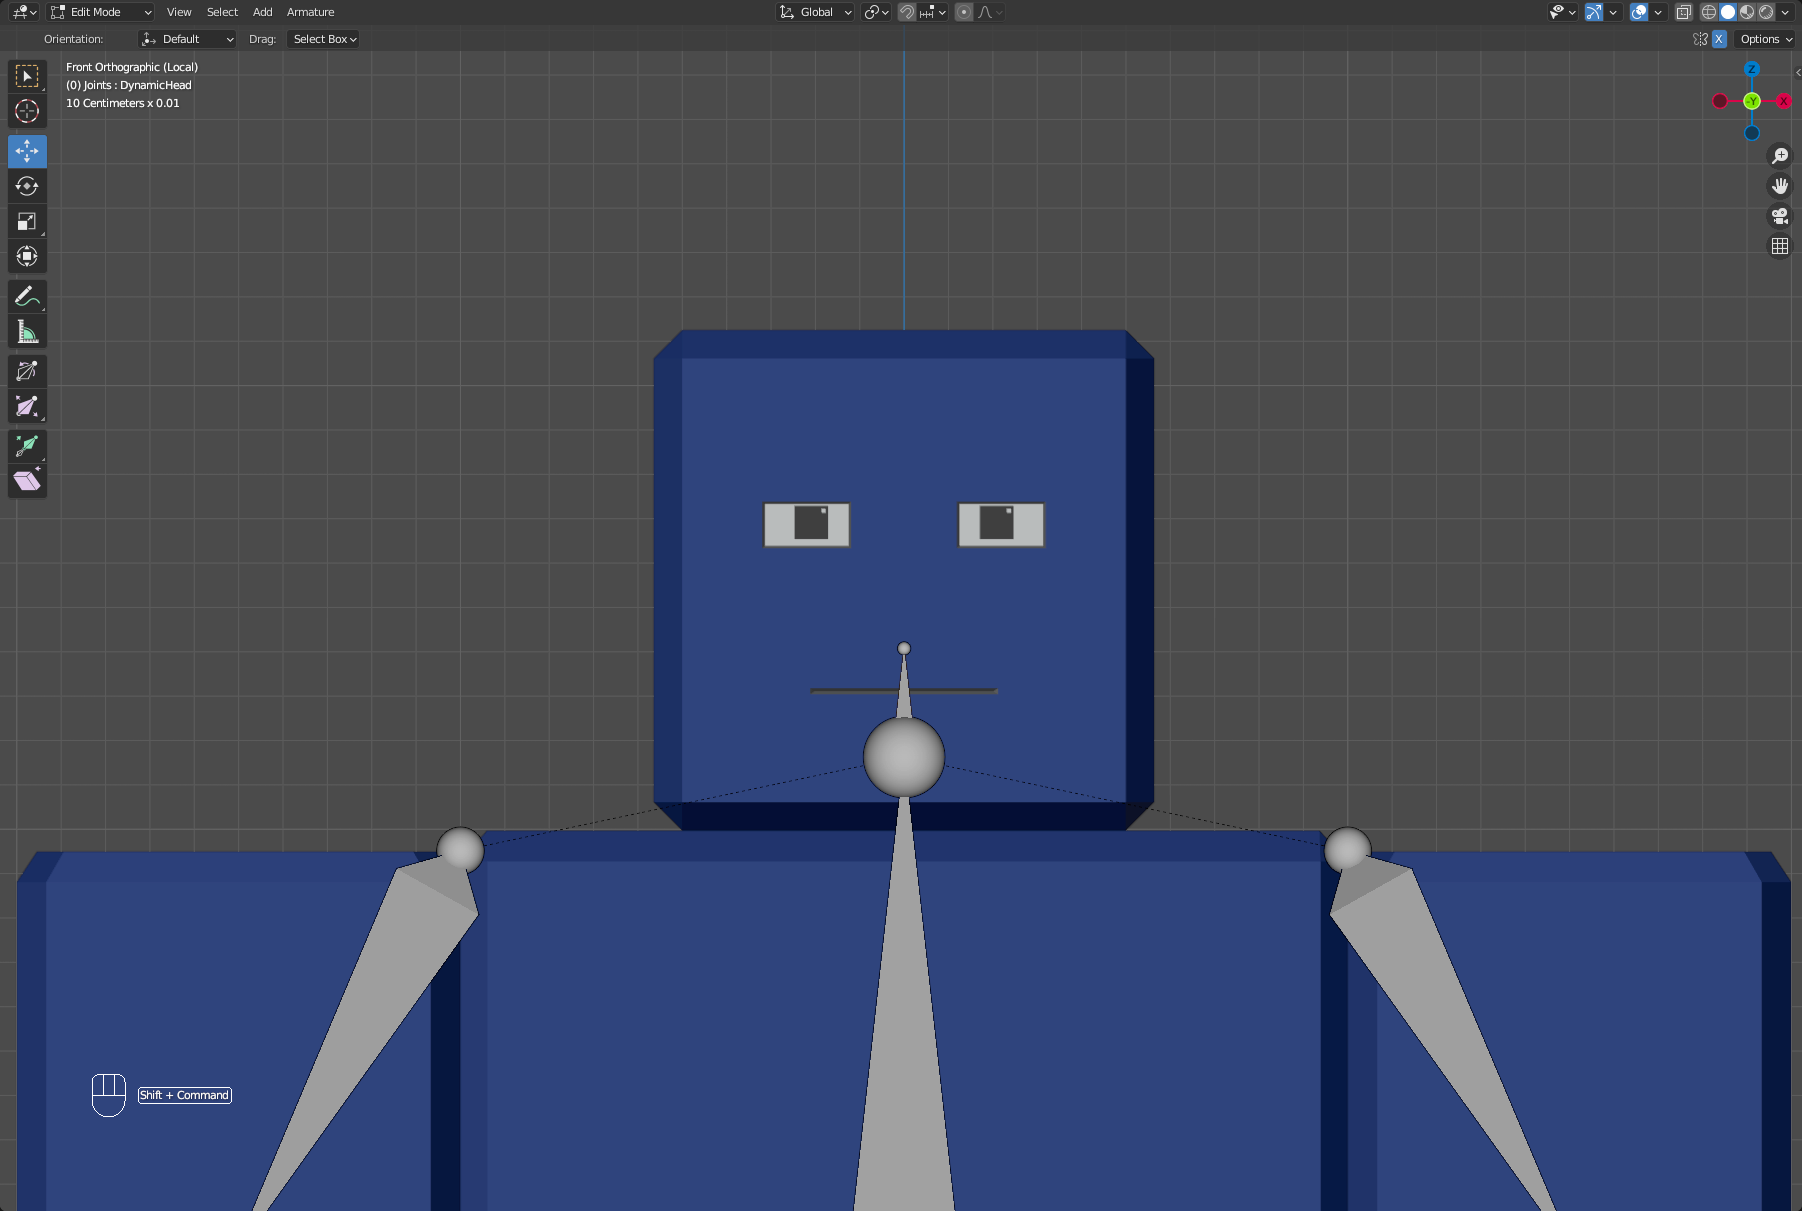
- Rigging: This is the process of creating a 'skeleton' or 'bones' inside your 3D head model. Each bone controls a specific part of the mesh. In Roblox Studio, you'll use 'Motor6D' instances to connect these bones.
- Skinning: Once rigged, you'll 'skin' your mesh to the bones, meaning you tell each vertex on the head which bones influence its movement and by how much. This allows for smooth deformation.
- Animation: Using Roblox Studio's Animation Editor, you can then create keyframe animations for your rigged head. This could be simple blinks, jaw movements for talking, or more complex emotional expressions.
- Dynamic Heads: For the most advanced animations, specifically facial expressions, you'll delve into 'Blend Shapes' (also known as 'Morph Targets'). These are pre-defined facial poses created in your 3D software (like Blender) that Roblox can smoothly blend between, giving incredibly fluid and realistic expressions.
Animating heads adds a layer of depth and immersion, especially relevant in today's social gaming landscape where character expression is key to interaction.
How do I upload and use my custom head in Roblox?
Once your custom head is modeled, textured, and perhaps even rigged, it's time to bring it into Roblox Studio and use it! The process involves importing your asset and then integrating it with an avatar. This is the final step in how to make a head in Roblox truly functional.
- Import Mesh: In Roblox Studio, go to the 'View' tab and open the 'Asset Manager'. Click 'Import' and select your FBX file. Roblox will process the mesh, and you can then insert it into your workspace.
- Apply Textures: Once imported, your mesh will appear. If textures weren't embedded in the FBX, you'll need to manually upload them to the 'Asset Manager' and then assign them to the 'MeshPart' using the 'TextureID' property.
- Rigging (if applicable): If your head is rigged for animation, ensure all 'Motor6D' joints are correctly connected.
- Attach to Avatar: For avatar heads, you'll typically replace the existing head. You'll need to ensure your custom head is correctly positioned and welded to the 'HumanoidRootPart' or 'Neck' joint of the avatar model. For R15, attach it as a child of the 'Head' part.
- Test Thoroughly: Always test your custom head in-game. Check for scaling issues, texture glitches, clipping, and animation problems. Make sure it moves naturally with the character.
Uploading your custom asset properly ensures it's ready for prime time, whether for your personal avatar or for players in your game.
Creating a custom head for Roblox is a rewarding journey that combines creativity with technical skill. It allows you to inject personality into your avatar or design unique characters for your games, making your experience truly your own. Whether you're a casual gamer looking for a fun project or a developer aiming for a distinctive game aesthetic, the tools and techniques are more accessible than ever. Remember, practice makes perfect, and every custom head you create builds on your skills. Don't be afraid to experiment and push the boundaries of your imagination. So, what's your biggest gaming challenge when it comes to avatar customization? Comment below!
FAQ Section
What is the difference between R6 and R15 heads? R6 avatars use a classic, blockier six-part body including a simple head. R15 avatars have 15 articulated body parts, allowing for smoother animations and more detailed mesh heads with greater flexibility in movement and expression.
Can I sell custom heads I make on Roblox? Yes, if you are part of the Roblox UGC (User Generated Content) program, you can create and sell custom avatar items, including heads, in the Avatar Shop. This program has specific requirements and application processes.
Do I need Robux to make a custom head? No, you do not need Robux to create a custom head using Roblox Studio and external 3D modeling software like Blender. However, uploading custom meshes and textures might incur small Robux fees for asset approval, or if you use the Avatar Shop to sell.
What are "mesh deformation" heads? Mesh deformation heads utilize advanced rigging and skinning techniques that allow the head's geometry to smoothly distort and bend, enabling realistic facial expressions and dynamic movements, often associated with Roblox's 'Dynamic Heads'.
Where can I find tutorials for Blender specific to Roblox head creation? Many excellent tutorials exist on YouTube and developer forums. Search for 'Blender Roblox head tutorial', 'Roblox mesh export Blender', or 'Roblox PBR texturing' to find guides specifically tailored to the platform's requirements. Look for creators active in the Roblox development community.
What are the best image formats for Roblox textures?
For optimal performance and quality, PNG is generally the preferred format for Roblox textures. PNG supports transparency and maintains high image quality. JPG can be used for textures where transparency is not needed and a smaller file size is desired, but it can introduce compression artifacts. Always ensure your texture dimensions are powers of two (e.g., 512x512, 1024x1024).
Creating custom Roblox heads, Roblox Studio head design, Avatar customization, Mesh deformation for heads, UV mapping for Roblox heads, Importing custom heads, Roblox asset creation, Performance optimization for custom assets, Balancing gaming and creative pursuits, Budget friendly Roblox customization.
35


Easily Make Classic Looking Dynamic Heads Faces ROBLOX UGC GUIDE . How To Make Dynamic Heads In Roblox Como Hacer Cabezas Dinamicas En . How To Make Roblox Head With Cardboard Part 1 DIY Tutorial YouTube . How To Create Custom Heads In Roblox Tutorial TikTok Img. Roblox Converting Classic Heads And Faces To Dynamic By Feb 2026 Roblox Character Creation


How To ANIMATE DYNAMIC HEADS On ROBLOX YouTube . Animar Cabezas Documentaci N Del Centro De Creaci N De Roblox Overview . How To Use Dynamic Heads In Roblox Studio YouTube Hqdefault . We Re Updating Heads Page 92 Developer Forum Roblox . How To Get FREE DYNAMIC HEADS On Roblox YouTube


How Do You Create UGC Bundles Dynamic Heads Art Design Support . How To Get Latest FREE DYNAMIC HEADS On Roblox YouTube . HOW TO HAVE A DYNAMIC HEAD IN ROBLOX YouTube . Create Basic Heads Roblox Creator Hub Open Project . How To Make Your Own Face In Roblox Complete Guide 2024 YouTube


HOW TO GET CLASSIC FACES BACK AFTER REMOVAL ROBLOX WORKING 2026 . Grab Your Roblox Avatar Headshot URL ROBLOX CUSTOMIZE AVATAR HEAD . Heads Please Codes February 2026 Deltia S Gaming Heads Please . Bot Roblox Head . How To Make A Head On Roblox Read Discription YouTube


How To Make Headless Head In Roblox For FREE 2024 YouTube . How To Get Headless In Roblox Your 2026 Guide . How To Draw ROBLOX HEADS Made By ME Creative Drawing Prompts . How To Get Headless In Roblox Your 2026 Guide . How To Make Roblox Head Profile Render Under 10 MINS YouTube


How To Make A Roblox Head Logo For YouTube YouTube . Roblox Head The Ultimate Guide To Customizing Your Avatar S Head ROBLOX FILESCHEEKS HEAD 450x450 . How To Get Headless In Roblox Your 2026 Guide Roblox How To Get Headless Head 1 . Roblox Converting Classic Heads And Faces To Dynamic By Feb 2026 . How To Make A Simple Custom Head In Roblox Animatronic World Tips Hqdefault


How To Make Mesh Heads On Roblox Updated YouTube . How To Unlock Roblox New Feature Dynamic Heads Avatar S YouTube . How To Make OVER HEAD GUI Tags Roblox Studio Tutorial YouTube . How To Get Headless In Roblox Your 2026 Guide . Why Did Roblox Remove Headless The Full Story Behind Its Absence